How We Turn a Problem Crawl Space Into Usable Storage Space in Fairview, Tennessee
Introduction
From Problem Space to Usable Space
WHAT IT REALLY TAKES TO FIX A CRAWL SPACE RIGHT
We just finished a job in Fairview, Tennessee that turned out to be a great example of what a crawl space can become when it's done right.
When we first got under this house, it wasn't pretty. There was a strong smell as soon as we opened up the access point. Mice had been active down there for a while, and fungus was growing throughout the space. This wasn't a simple "lay down some plastic and call it done" situation.
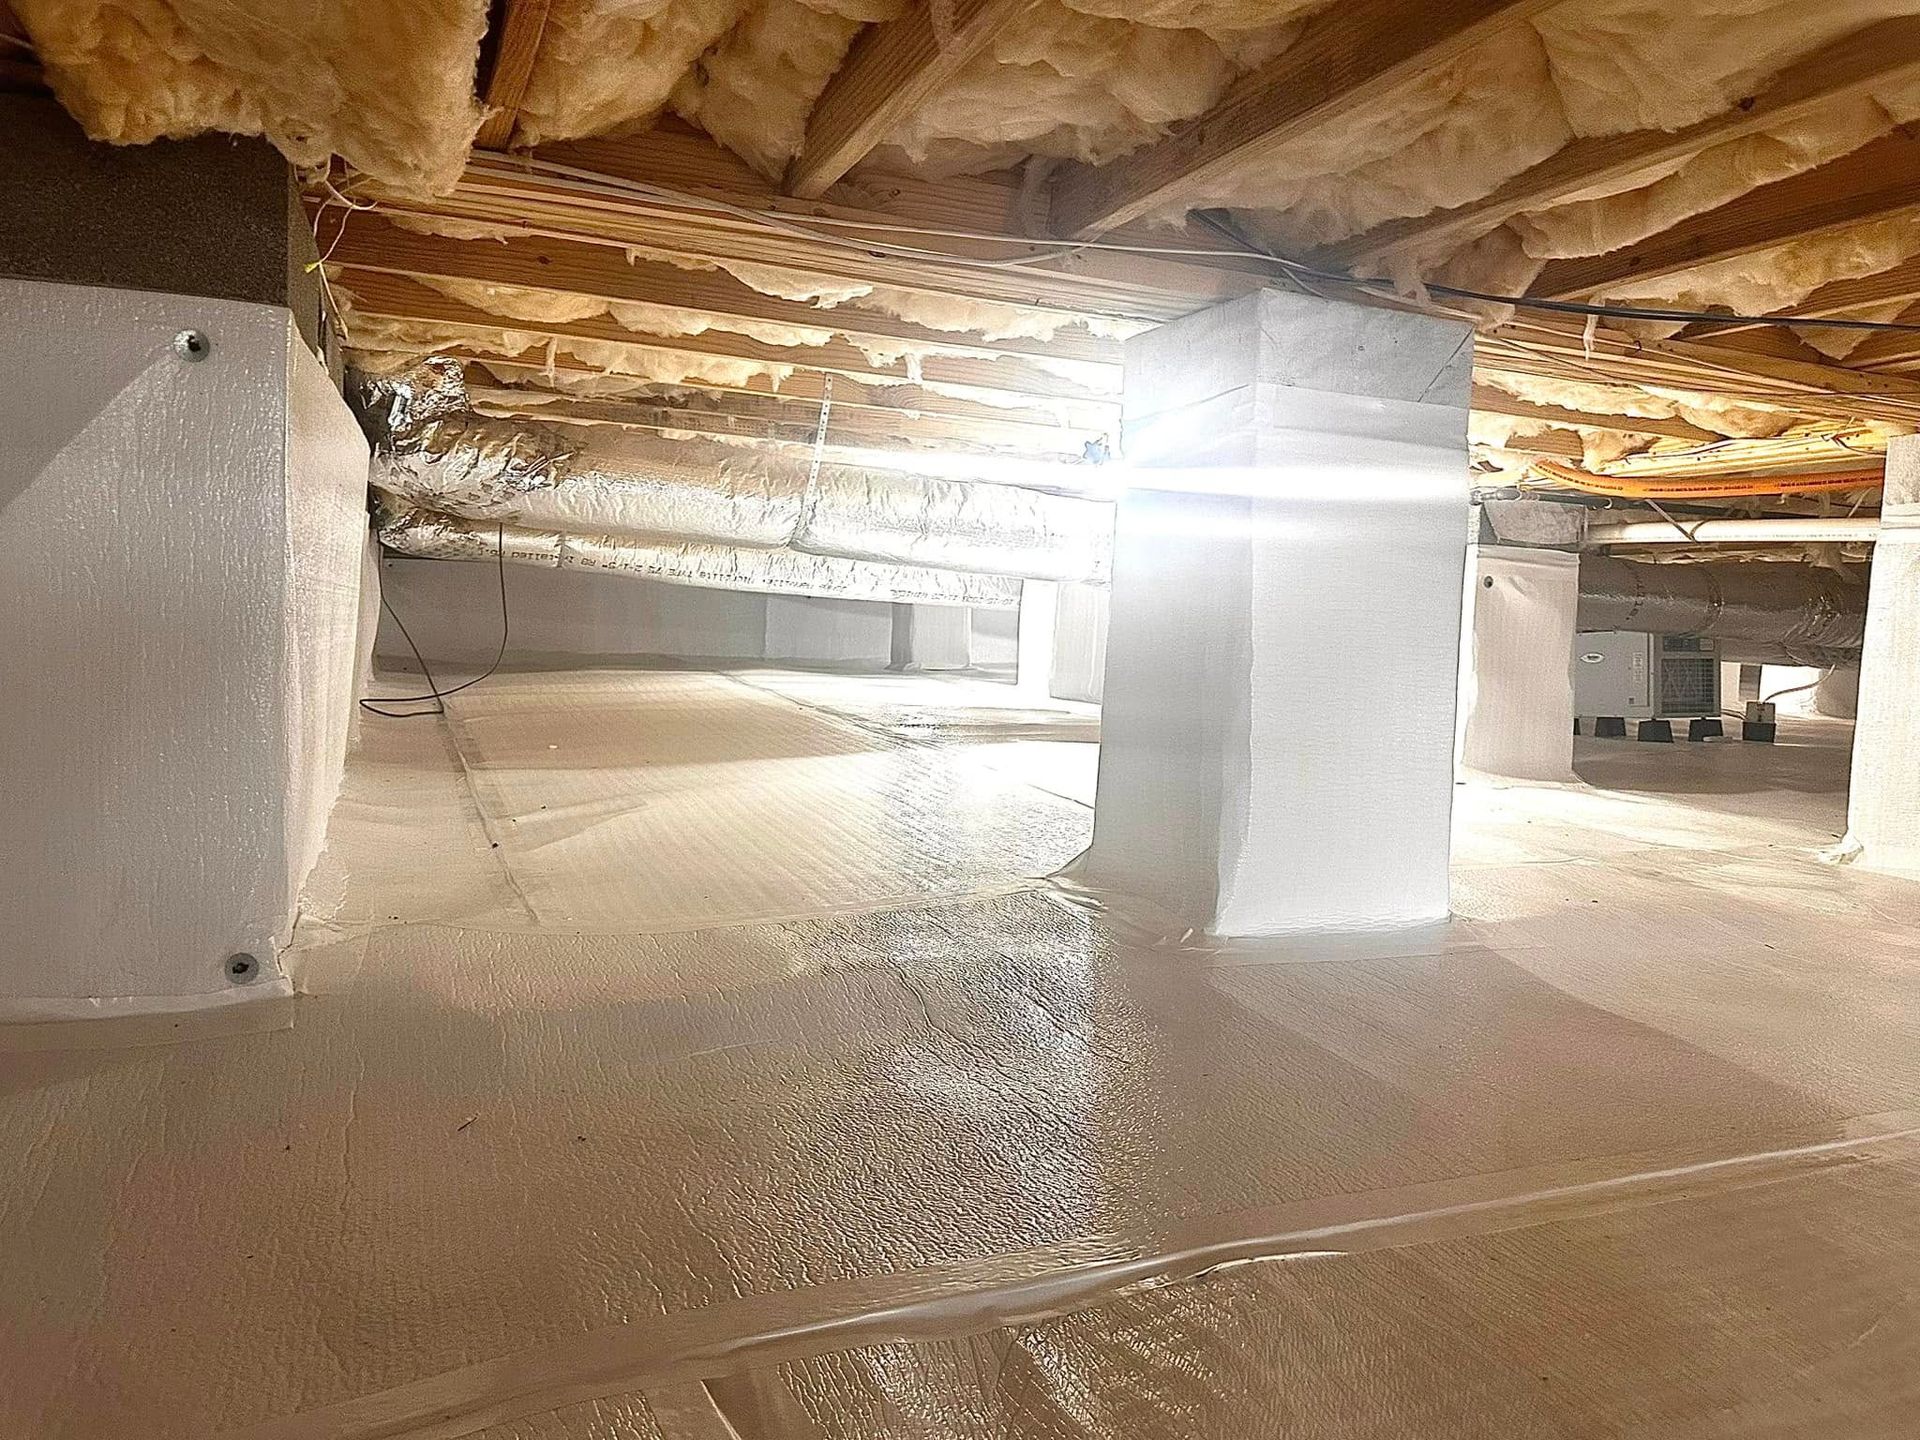
By the time we finished, the space looked completely different. Clean, bright, dry, and ready to use. The homeowner's actually going to use it for storage now, which tells you everything about how far it came.
This is what a real crawl space transformation looks like. Not just covering up a problem, but fixing it from the ground up.

What We Found Under the House
The smell is usually the first clue that something's wrong. In this case, it pointed straight to mice activity. When rodents have been living in a crawl space for a while, you can smell it before you even see any signs of them.
On top of that, we found fungus growing throughout the space. This usually happens when there's excess moisture with nowhere to go. Combine that with pest activity, and you've got a crawl space that's affecting more than just the space itself. It can impact air quality in the home above it.
These two problems often show up together. Where there's moisture, there's a good chance pests have found their way in too. Rodents like damp, dark places, and a crawl space with poor ventilation and no barrier is an easy target.
When we see this combination, it tells us the crawl space probably hasn't been touched in a long time, or it was never done right in the first place.



Why You Can't Just Cover Up These Problems
It's tempting to think encapsulation alone fixes everything. Lay down a nice liner, seal it up, and the crawl space looks great. But if there's mold or pest activity underneath that liner, you haven't actually solved anything. You've just hidden it.
Encapsulating over fungus doesn't kill it. It's still there, still growing, just out of sight. And sealing up a space that still has rodent activity means you're trapping that problem inside instead of getting rid of it. Either way, you end up with a nice-looking crawl space that's still got a real problem underneath it.
This is one of the biggest shortcuts we see in this industry. It looks good in photos. It makes for an easy sale. But it doesn't actually protect the home or the people living in it.
Doing it right means dealing with what's actually going on before you ever roll out the plastic.
Step One: Rodent-Proofing the Space
Before we touched the encapsulation, we rodent-proofed this crawl space. That means finding where pests are getting in and sealing those entry points so they can't come back.
This step has to happen first. If you encapsulate before dealing with an active rodent problem, you're basically building them a nice new home with better insulation. They'll chew through the liner, nest in the insulation, and you'll be right back where you started, except now you've got a damaged encapsulation on top of a pest problem.
Rodent-proofing isn't complicated, but it does require knowing what to look for. Gaps around pipes, vents, foundation cracks. The kind of openings that are easy to miss if you're not specifically looking for them.
Getting this right the first time means the homeowner doesn't have to deal with the same issue again six months down the road.
Step Two: Disinfecting and Removing Fungus
Once the rodent-proofing was done, we moved on to disinfecting the space and dealing with the fungus.
This step matters for a couple of reasons. First, it gets rid of the smell. Mice activity and fungus both leave behind odors that don't just go away on their own, even after the source is handled. Disinfecting clears that out.
Second, and more importantly, it deals with the health side of things. Fungus in a crawl space doesn't just stay in the crawl space. Air moves between that space and the rest of the house. If there's mold or fungus growing down there, it can affect the air quality upstairs too.
Getting the space disinfected and clean gives us a fresh starting point. No hidden problems waiting under the new liner. Just a clean, ready crawl space before we move on to the actual encapsulation.
Step Three: The 125 Mil Encapsulation and Drain Mat
With the space rodent-proofed, disinfected, and clean, we moved on to the encapsulation itself. For this job, we used a 125 mil liner, which is about as high-end as it gets. It's thick, durable, and built to last a lot longer than the cheaper options you'll see from some companies.
We also added a drain mat underneath. This gives any moisture that does show up somewhere to go instead of just sitting against the liner. It's an extra step that a lot of companies skip, but it makes a real difference in how the space holds up over time.
On top of that, we installed lighting throughout the crawl space. This isn't just for looks. Good lighting means the homeowner, or anyone else who needs to go down there later, can actually see what they're doing. It also makes it a lot easier for us to spot any issues during yearly checkups.

Ready to Fix Your Crawl Space the Right Way?
If you've got questions about plumbing leaks, encapsulation, or anything else going on under your house, reach out. I'm happy to talk you through it.
We offer free inspections for homeowners in Franklin and the surrounding Nashville area. I do the inspections myself, so you're getting a straight answer, not a sales pitch. If there's an issue, I'll show you exactly what's going on and walk you through your options.
That's how we handle things at Crawl Logic.